Hello everyone, 2 days ago I recieved my arduino kit that I had ordered and i’m really excited to tell you that I’ll be posting more arduino tutorials from now on.
One of the cool things that i discoved that i’m sharing with you here, is communication of Arduino and NodeJS using serial ports. Basically what we’re doing is sending some data(zeros and ones) from the arduino to the land of Javascript and NodeJS.
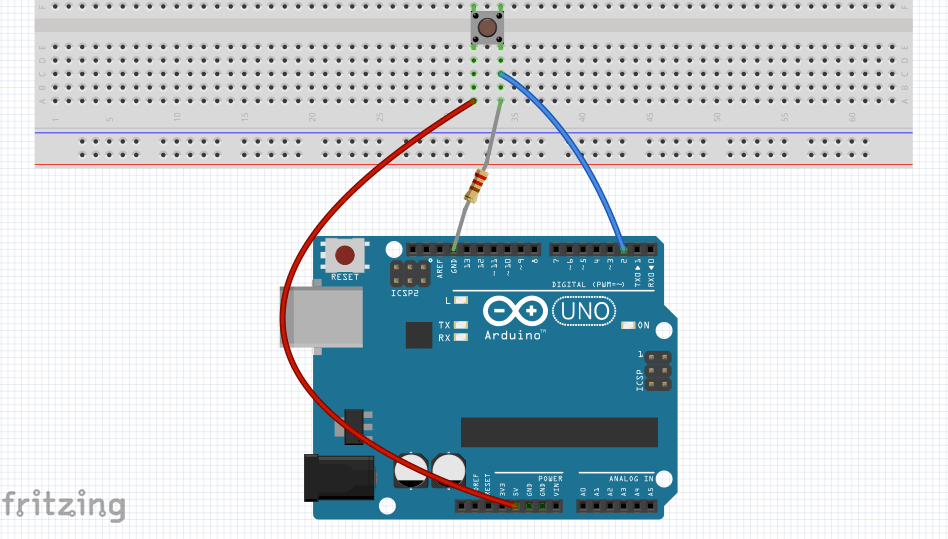
Circuit
This is the schematic of our cicuit, pretty simple. When you wire up things this way, by pressing the button we’re able to digitally read the value of pin 2, which if the button is pressed it’s 1 and if it isn’t, the value is 0.
Arduino
The Arduino code is pretty straightforward and commented. Basically we say, pin number 2 is an input, then in our loop function we digitally read it’s value every 100ms. If the value is HIGH(1) in our using Serial.write we write 1 into the serialport and if it’s LOW(0) we write 0.
1 2 3 4 5 6 7 8 9 10 11 12 13 14 15 16 17 18 19 20 21 22 23 24 25 26 27 28 29 30 31 32 | |
NodeJS
With the help of serialport library we can easily get connected to the port that Arduino Board is connected and start our reading. From Tools/Serial Port in Arduino IDE, get the port that the board is connected. Mine is /dev/tty.usbmodem1421 and yours might be different. On windows computers the port should start with COM. When you had you port address, replace it mine.
In our js code, we load the libary and make a instance of it by passing our port address. Then after the port got oponed, we start listening for the data, and log it. By the way the data is a buffer so it’s your choice how you’re going to parse and use it. But here, just to show that these two worlds are communicating, the first index of data is 0 whenever we write 0, and 1 whenever we write 1 into the Serial in arduino(Which means anytime we press the button).
1 2 3 4 5 6 7 8 | |
After you uploaded the app to Arduino and it was running, in your teminal run node app.js and press the button and enjoy getting zeros and ones !!!!
Last but not least
There is an awesome javascript framework for Arduino called Johnny-Five which has really nie API and there a lot of cool projects and examples on their page which I highly recommend to check it out.
The source code of this tutorial is here on GitHub.